Easy 3 Ingredient No-Churn Recipe
When summer heat really settles in across the U.S., dessert kind of stops being optional. It’s just what you reach for when everything feels too warm and heavy, and you want something cold that actually feels worth it.
That’s usually when people start digging around for vegan summer dessert recipes that don’t feel like a compromise or a “healthy version” of something better. Just something good on its own.
The problem is, most frozen desserts come with a bit of baggage. Ice cream makers, long steps, or ingredient lists that feel more like lab notes than something you’d actually want to cook with. That’s where this homemade dairy free ice cream without machine idea really comes in handy.
No churner sitting on the counter. No special setup. Just a simple mix, a freezer, and a bit of patience. If you’ve ever tried no churn almond milk ice cream or messed around with almond milk ice cream no churn recipes that turned icy or flat, you probably already know how hit-or-miss it can be.
This version is meant to fix that without overcomplicating things. It’s the kind of easy summer vegan dessert you make when friends are coming over, the grill’s already going, and you just want something cold waiting in the freezer that actually feels like a treat.

Recipe Card:
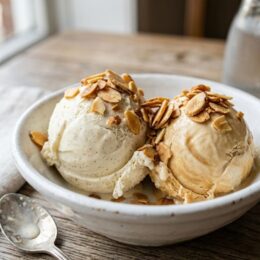
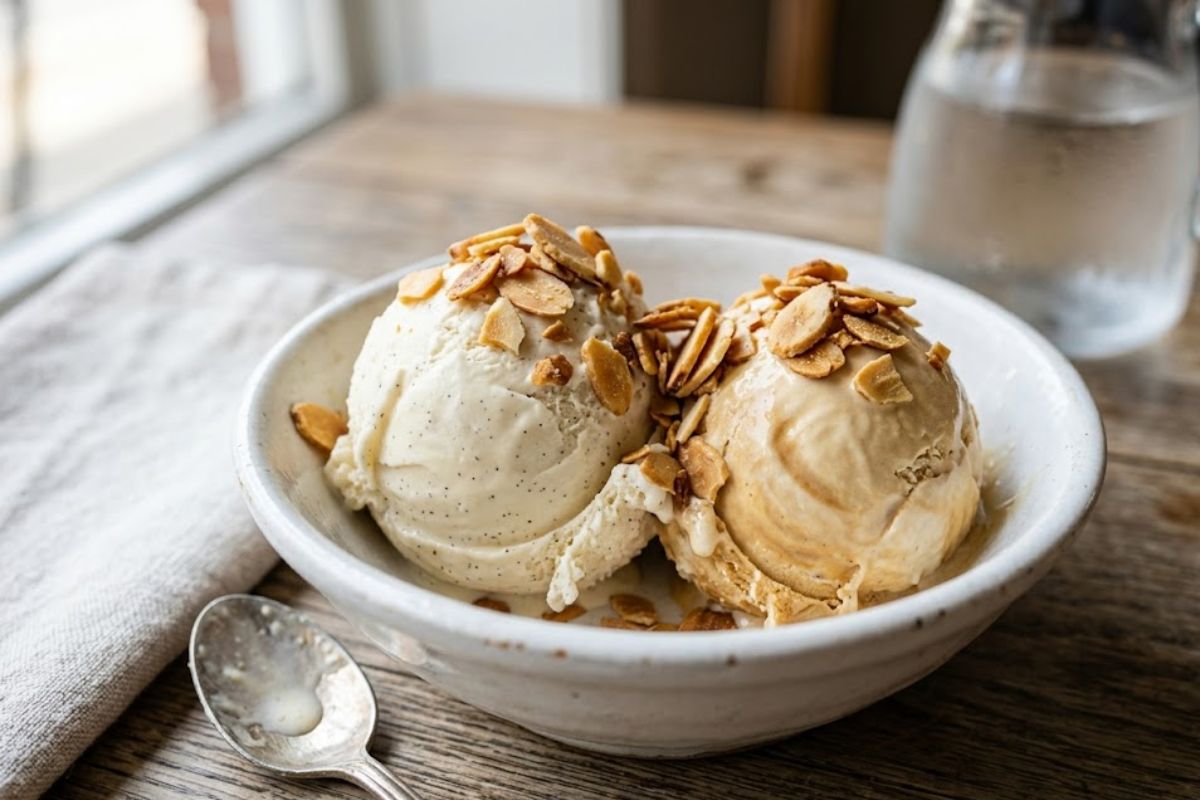
Homemade Dairy Free Ice Cream Without Machine
Equipment
- 1 High-speed blender
- 1 Rubber Spatula
- 1 Measuring cups and spoons
- 1 Metal loaf pan (9×5-inch)
- 1 Plastic wrap
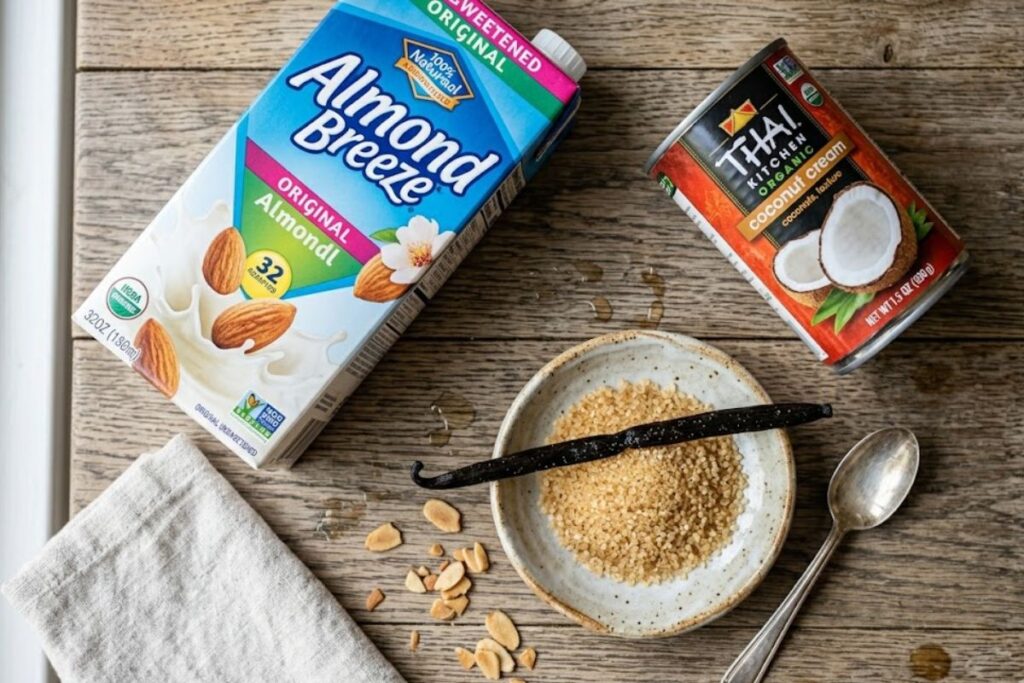
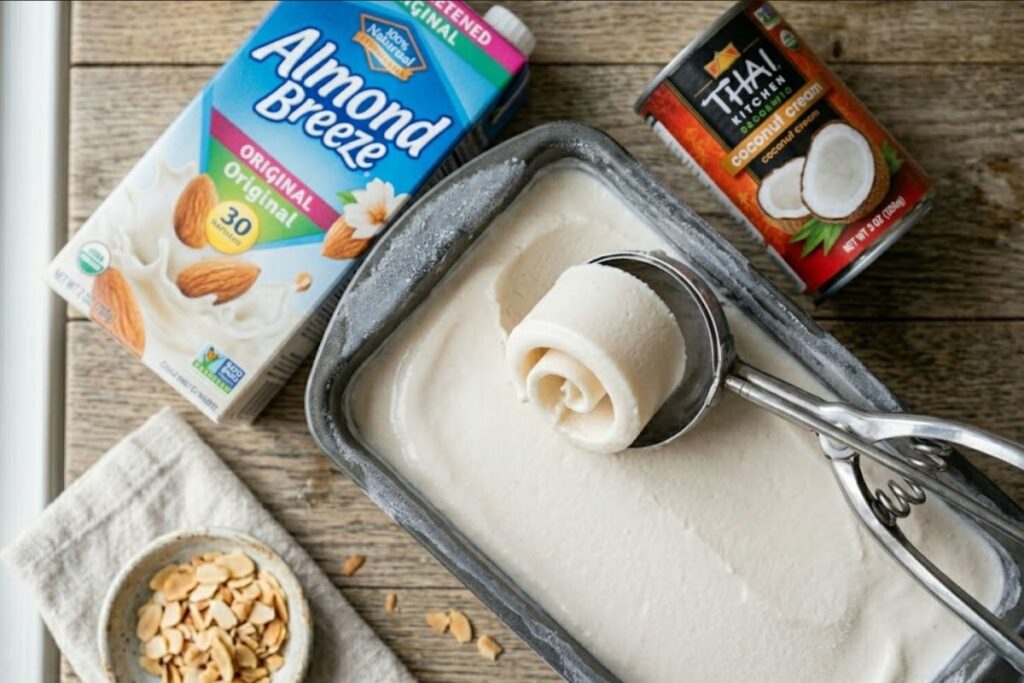
Ingredients
- 1 can 13.5 oz full-fat coconut cream chilled overnight
- 1 cup unsweetened almond milk
- ⅓ cup pure maple syrup
- 2 tsp pure vanilla extract
- ¼ tsp fine sea salt
- 1 tbspn almond butter optional, for extra creaminess
- Optional Mix-Ins
- 2 tbsp crushed cookies
- ¼ cup fresh berries
- ¼ cup chopped toasted almonds
- ¼ cup dairy-free chocolate chips
Optional Mix-Ins
Instructions
- Chill the Pan: Place your metal loaf pan in the freezer before you begin.
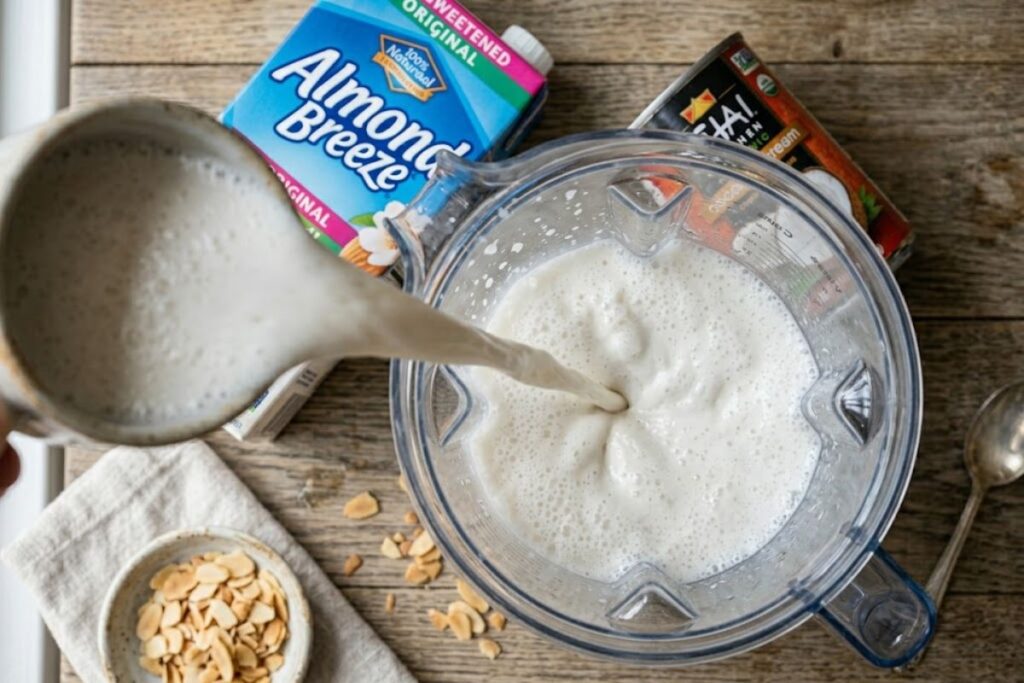
- Separate the Cream: Open the chilled can of coconut cream and scoop the thick, hardened cream into your blender. Reserve any leftover watery liquid at the bottom for smoothies.
- Blend the Base: Add the almond milk, maple syrup, vanilla extract, sea salt, and almond butter (if using) to the blender. Blend on high speed for 60 to 90 seconds until the mixture is completely smooth and slightly frothy.
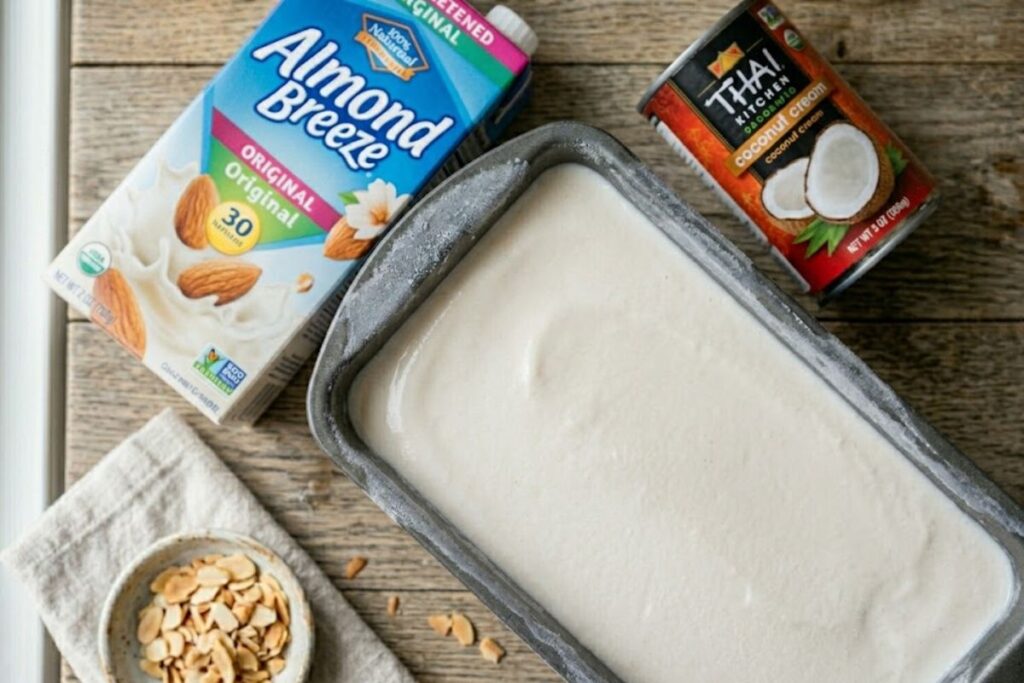
- Fold in Mix-Ins: Pour the mixture into your chilled loaf pan. If using mix-ins, gently fold them into the liquid base with a spatula.
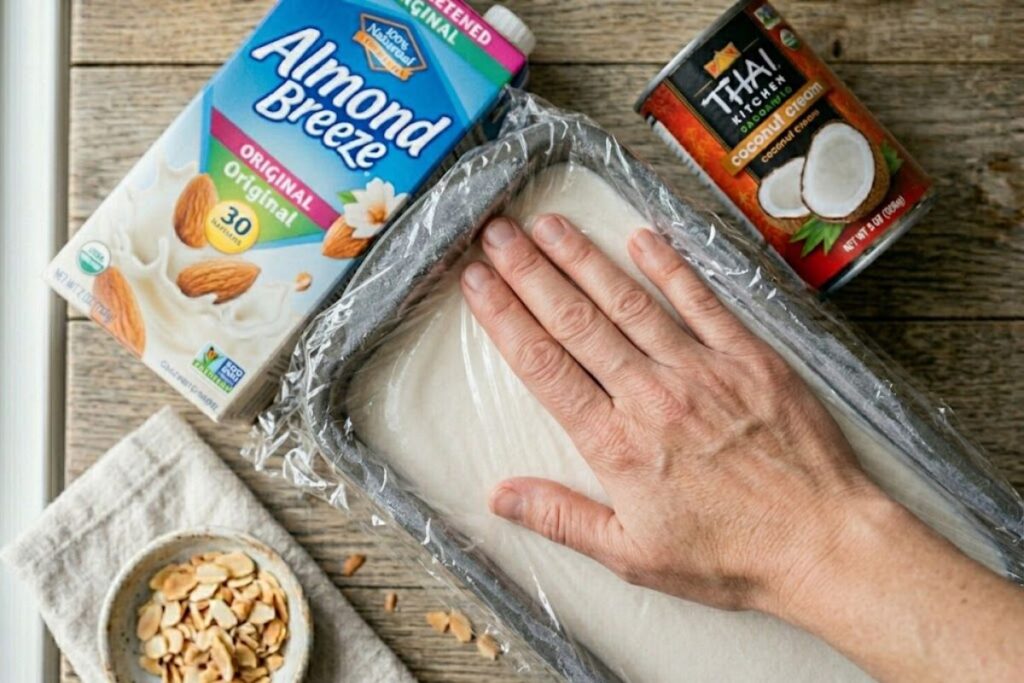
- The Contact-Wrap Trick: Press a sheet of plastic wrap directly onto the surface of the liquid. This prevents freezer burn and ice crystals from forming on top.
- Freeze: Freeze undisturbed for at least 6 hours, or overnight.
- Soften and Serve: Remove from the freezer and let it sit at room temperature for 5 to 10 minutes before scooping.
Notes
- For the creamiest texture, use full-fat coconut cream, not light coconut milk.
- A metal loaf pan freezes the mixture more evenly than glass or plastic containers.
- Store in an airtight container for up to 2 weeks.
- If the ice cream becomes very firm, allow it to soften for 10 minutes before scooping.
Nutrition (Per Serving, Approximate)
- Calories: 245
- Carbohydrates: 16g
- Protein: 2g
- Fat: 20g
- Saturated Fat: 14g
- Fiber: 2g
- Sugar: 11g
- Sodium: 95mg
Why This No-Churn Dairy-Free Ice Cream Actually Works
The trick behind a creamy homemade dairy free ice cream without machine is really just getting the balance right between fat, water, and sweetness.
Traditional ice cream relies on churning to break up ice crystals and trap air. Without that step, frozen mixtures usually turn dense or icy pretty quickly.
This recipe avoids that by leaning on a few key ingredients:
Almond milk gives the base, but it’s mostly water, which is exactly why it needs support.
Full-fat coconut cream brings in the richness and fat that keeps everything soft and creamy instead of icy.
Maple syrup doesn’t just sweeten it — it also helps keep the texture from freezing rock solid.
Put together, they form a base that freezes smoothly even without an ice cream maker. What you get is a scoopable almond milk ice cream no churn style dessert that actually holds its creaminess instead of turning into a frozen block.
In the simplest terms: fat smooths it out, water gets controlled, and sugar keeps it scoopable.
According to nutritional data from the USDA FoodData Central Database, almond milk is primarily composed of water with minimal fat content, which explains why it needs added richness for frozen desserts.
Ingredients Checklist & Smart Swaps
One reason this homemade dairy free ice cream without machine recipe works so well is that every ingredient has a specific job. Together, they create the creamy texture that makes this dessert taste far more indulgent than its simple ingredient list suggests.
Unsweetened Almond Milk (1 Cup)
Almond milk provides a light, neutral base with a subtle nutty flavor. Using an unsweetened variety gives you complete control over the sweetness and keeps the flavor balanced.
Full-Fat Coconut Cream (13.5 oz Can)
This is the ingredient responsible for the rich, scoopable texture. The higher fat content helps prevent large ice crystals from forming, creating a creamier frozen dessert.
Pure Maple Syrup (⅓ Cup)
Maple syrup sweetens the ice cream while also helping it stay softer in the freezer. Liquid sweeteners blend more smoothly into the base than granulated sugar.
Pure Vanilla Extract (2 Teaspoons)
Vanilla enhances the overall flavor and adds the classic ice cream taste everyone expects from a homemade frozen dessert.
Fine Sea Salt (¼ Teaspoon)
A small amount of salt balances sweetness and helps bring out the flavors of the vanilla, almond milk, and coconut cream.
Optional: Almond Butter (1 Tablespoon)
For an even richer texture, a spoonful of almond butter adds extra creaminess and a subtle roasted nut flavor.
Smart Ingredient Swaps
Nut-Free Option
Replace almond milk with unsweetened oat milk. Oat milk naturally creates a creamy texture and works beautifully in vegan frozen desserts.
Lower-Sugar Option
Swap the maple syrup for liquid allulose. It helps maintain a softer texture while reducing the overall sugar content.
Coconut Flavor Too Strong?
Use refined coconut cream if available. It provides the same creamy texture with a milder coconut taste.
Different Flavor Variations
Once you’ve mastered the base recipe, try adding:
- Fresh strawberries or blueberries
- Dairy-free chocolate chips
- Crushed sandwich cookies
- Toasted pecans or walnuts
- Peanut butter swirl
- Espresso powder for a coffee flavor
The beauty of this almond milk ice cream no churn recipe is its flexibility. With a few simple swaps, you can customize it for different dietary needs, flavor preferences, and summer occasions without sacrificing the creamy texture that makes it so satisfying.
Step-by-Step Guide for Perfect No-Churn Dairy-Free Ice Cream
Making this homemade dairy free ice cream without machine is surprisingly simple, but a few small details can make a big difference in the final texture.
Step 1: Chill the Pan
Place a standard 9×5-inch metal loaf pan in the freezer before you begin. A cold metal pan helps the ice cream base start freezing immediately, which encourages a smoother texture and reduces ice crystal formation.
Step 2: Blend the Ice Cream Base
Open the chilled can of coconut cream and scoop the thick cream into a blender, leaving any watery liquid behind.
Add:
- Almond milk
- Maple syrup
- Vanilla extract
- Sea salt
Blend on high speed for 60 to 90 seconds until the mixture looks smooth, creamy, and slightly frothy.
Step 3: Add Any Mix-Ins
Remove the chilled loaf pan from the freezer and pour in the ice cream mixture.
If you’d like extra texture, gently stir in ingredients such as:
- Dairy-free chocolate chips
- Chopped toasted almonds
- Crushed cookies
- Fresh berries
Spread everything evenly with a silicone spatula.
Step 4: Cover the Surface
For the creamiest results, press a sheet of plastic wrap directly onto the surface of the mixture before covering the pan.
This simple trick helps prevent excess moisture and freezer frost from forming on top of the ice cream.
Step 5: Freeze Until Firm
Transfer the pan to the freezer and leave it undisturbed for at least 6 hours, or overnight for the best texture.
Step 6: Scoop and Serve
Remove the ice cream from the freezer and let it sit at room temperature for 5 to 10 minutes before scooping.
Serve in bowls, cones, or alongside your favorite summer desserts for a refreshing dairy-free treat.
Flavor Variations You’ll Want to Make All Summer
Once you’ve mastered the classic vanilla base, it’s easy to create new flavors that make this homemade dairy free ice cream without machine feel different every time you make it.
Decadent Chocolate Fudge Swirl
Chocolate and almond are a natural match. For a rich fudge ripple effect, melt:
- ½ cup dairy-free chocolate chips
- 2 tablespoons almond butter
- 1 tablespoon maple syrup
Stir until smooth and glossy.
After pouring the ice cream base into the loaf pan, drizzle the chocolate mixture over the top. Use a butter knife to gently swirl it through the mixture, creating ribbons of chocolate that freeze into every scoop.
Fresh Summer Berry Swirl
Looking for one of the most refreshing vegan summer dessert recipes? A berry swirl adds bright flavor and beautiful color.
In a small saucepan, combine:
- 1 cup fresh strawberries or raspberries
- 1 tablespoon lemon juice
- 2 tablespoons maple syrup
Cook for 5 to 7 minutes, stirring occasionally, until the berries break down into a thick sauce. Allow the mixture to cool completely.
Drop spoonfuls of the berry mixture over the ice cream base and gently swirl with a knife before freezing.
Toasted Almond Crunch
For extra texture and nutty flavor, toast:
- ¾ cup chopped almonds
in a dry skillet for 3 to 4 minutes until fragrant.
Let them cool completely, then stir half into the ice cream base and sprinkle the remaining almonds over the top before freezing. A small pinch of flaky sea salt adds a sweet-and-salty finish that pairs beautifully with the creamy vanilla base.
Peanut Butter Cup
Swirl ¼ cup creamy peanut butter into the mixture and fold in dairy-free chocolate chips. The result tastes like a frozen peanut butter cup in ice cream form.
Cookies & Cream
Fold 6 to 8 crushed dairy-free sandwich cookies into the base before freezing. This variation is always a crowd favorite at summer gatherings.
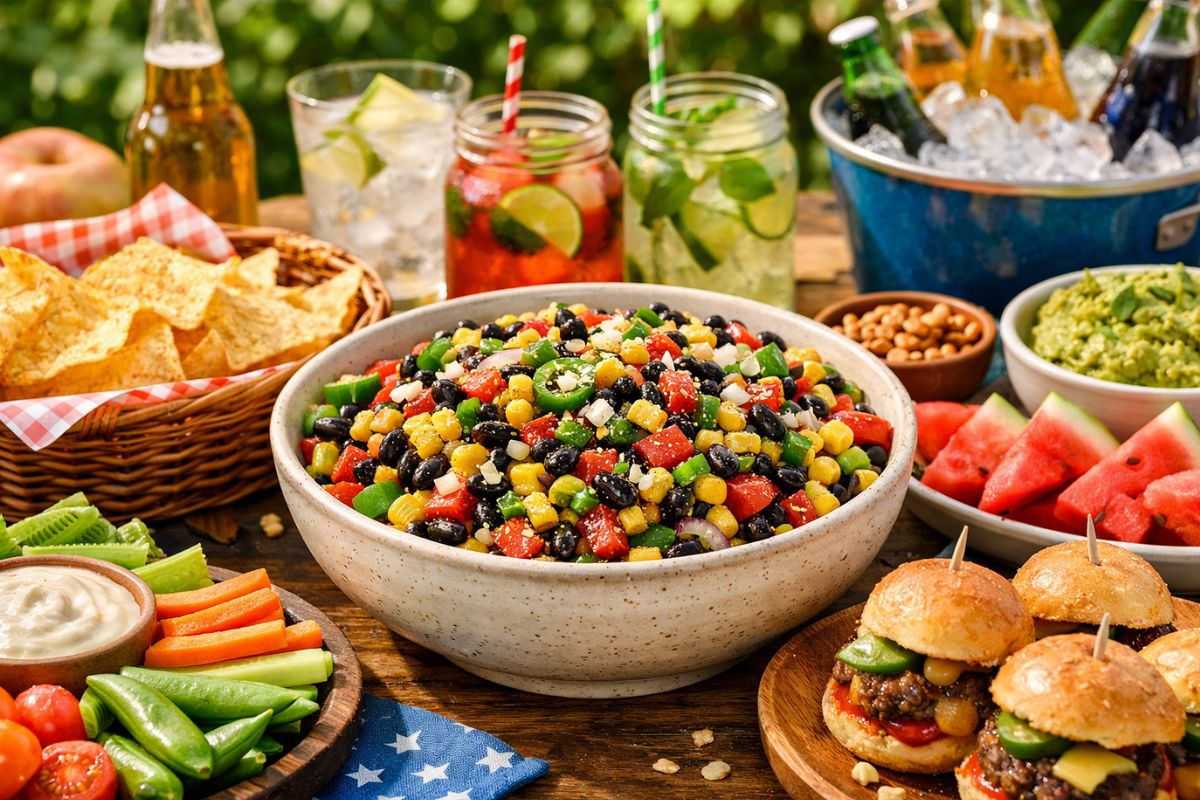
This is the kind of easy summer vegan dessert you make when friends are coming over, the grill’s already going, and something like these Epic Chicken Parm Sliders is already on the table.
Coffee Almond Crunch
Mix 1 teaspoon instant espresso powder into the blended base, then add toasted almonds for a dairy-free coffeehouse-inspired dessert with a satisfying crunch.
The same balance of richness you see in comfort dishes like Easy Creamy Carbonara Recipe carries through here too, just in a frozen, plant-based form.
Expert Tips for the Perfect Scoop
Because this homemade dairy free ice cream without machine skips stabilizers, gums, and egg yolks, it behaves a little differently than store-bought ice cream straight from the freezer. The good news is, a few small tricks bring it right back into that creamy, scoop-shop zone.
The Countertop Softening Trick
Right out of a deep freezer, this ice cream will feel firm. That’s normal.
Instead of forcing it, simply let the loaf pan sit on the counter for 5 to 8 minutes before scooping. This short resting time allows the coconut-based fats to relax slightly, turning the texture from solid to smooth and scoopable.
Think of it as the ice cream “waking up” before serving.
Warm Scoop, Better Texture
For the cleanest scoops, use a sturdy ice cream scoop and dip it in warm water before each pass. It helps the scoop glide through the frozen base without breaking it into chunks.
The Shaving Method (Pro Move)
Instead of digging straight down, try shaving across the surface in long, gentle strokes. This creates soft ribbons instead of dense blocks, giving each serving a lighter, airier feel.
It’s a small technique shift, but it makes the texture feel closer to premium ice cream shop scoops.
Serve Like a Pro
For the best experience, serve immediately after scooping. Add toppings right away so they gently melt into the surface, enhancing every bite with contrast and creaminess.
With these simple adjustments, your almond milk ice cream no churn recipe moves from “good homemade dessert” to something that feels like it came from a specialty scoop bar on a hot American summer afternoon.
.
Frequently Asked Questions (FAQs)
Can I use light carton coconut milk instead of canned coconut cream?
No. Light carton coconut milk contains a much higher water content, which leads to large ice crystals forming during freezing. The result is a hard, icy block rather than a smooth, scoopable dessert. For the best , always use full-fat canned coconut cream.
How long can I store this in the freezer?
You can store this ice cream for up to 2 to 3 weeks in a well-sealed container.
For best texture, press plastic wrap directly against the surface before sealing the lid. This reduces air exposure and helps prevent freezer frost or ice buildup. Let it sit at room temperature for a few minutes before scooping each time to bring back that creamy, soft texture.
Why is my ice cream too hard after freezing?
This usually happens if the mixture has too much water or not enough fat. Make sure you’re using full-fat coconut cream and not substituting with low-fat versions. The fat content is what keeps this almond milk ice cream no churn recipe creamy instead of icy.
Can I make this without almond milk?
Yes. You can replace almond milk with oat milk or cashew milk. Both work well because they naturally have a creamier texture, making them great options for easy summer vegan desserts.
If you love rich, layered desserts like Midnight Magic: Ultimate Arabic Kunafa, this frozen version brings a similar indulgent texture in a completely dairy-free way.
Do I need an ice cream maker at all?
No. That’s the whole advantage of this recipe. It’s designed specifically as a no churn almond milk ice cream method, using fat balance and freezing technique instead of mechanical churning.
Can I reduce the sugar?
Yes, but with caution. Sugar doesn’t just sweeten the ice cream—it also helps keep it soft. If you reduce it too much, the texture may become harder and more icy. Liquid sweeteners like maple syrup or allulose work best for maintaining scoopability.