Introduction
Cooking chicken to the correct internal temperature is the key to serving poultry that’s both safe to eat and perfectly juicy. While many home cooks rely on cooking times or the color of the meat, the only reliable way to know when chicken is done is by checking its internal temperature with an instant-read thermometer. In this guide, you’ll learn the USDA’s recommended safe temperature, the ideal finished temperatures for different chicken cuts, how to measure them accurately, and expert tips to keep every bite tender and flavorful.
Quick Answer
What internal temperature is chicken done?
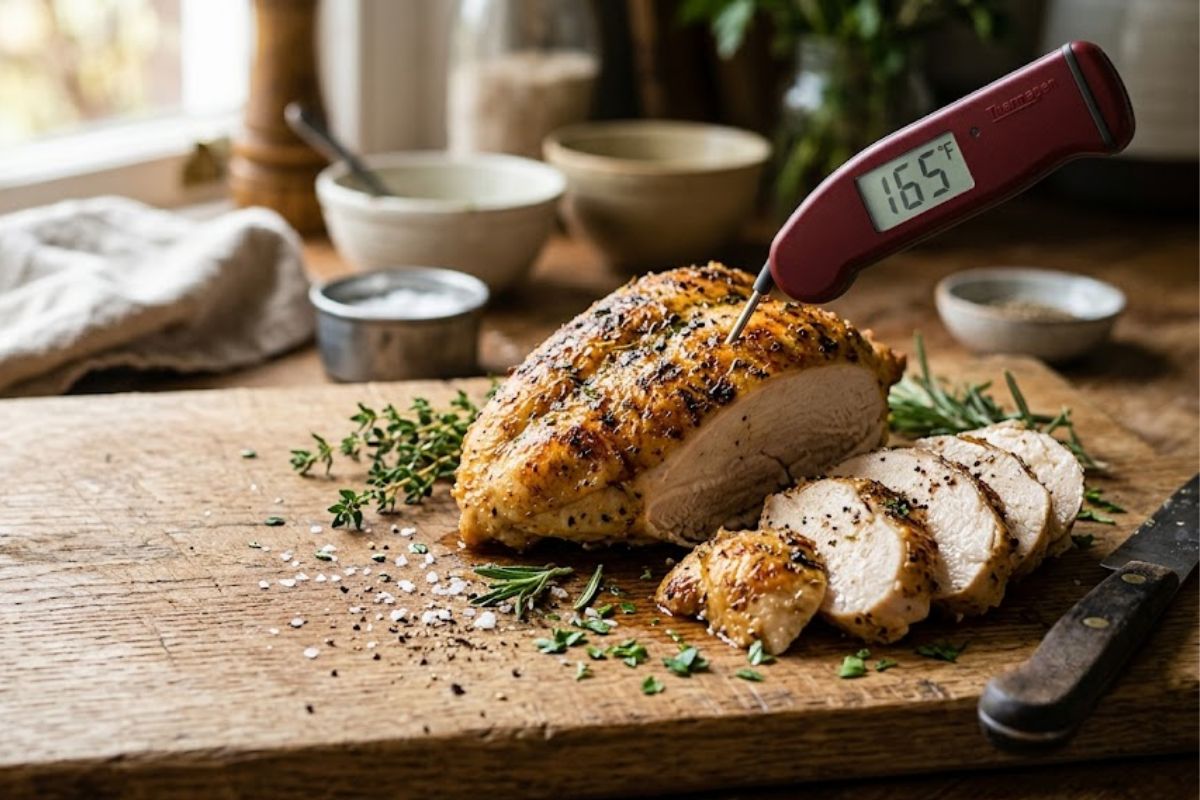
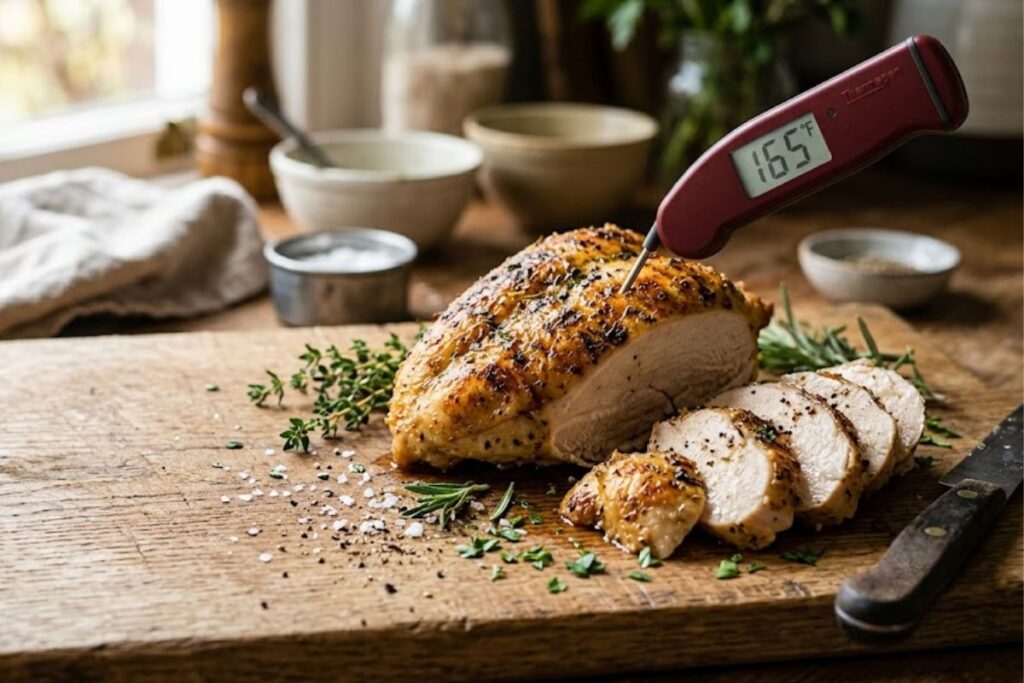
Chicken is officially safe to eat at 165°F (74°C). Pull lean chicken breasts at 160°F–162°F and let carryover cooking bring them to 165°F. For rich, tender chicken thighs and legs, target 175°F–185°F to fully break down tough connective tissue.
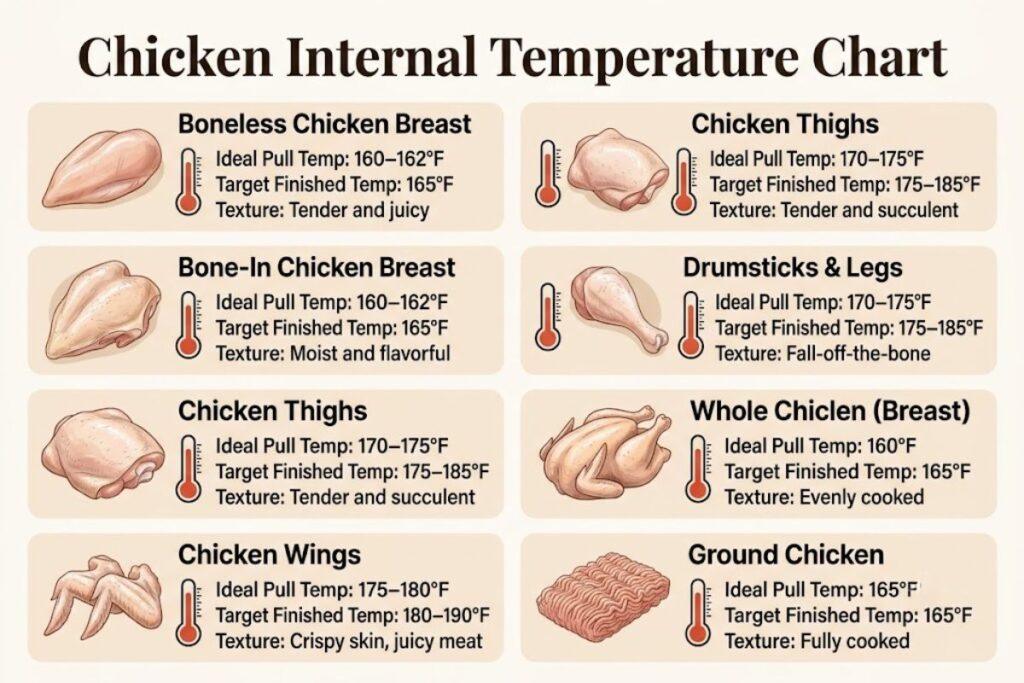
Internal Temperature Target Chart
| Chicken Cut | Ideal Pull Temp (Off Heat) | Target Finished Temp | Texture |
|---|---|---|---|
| Boneless Chicken Breast | 160–162°F | 165°F | Tender and juicy |
| Bone-In Chicken Breast | 160–162°F | 165°F | Moist and flavorful |
| Chicken Thighs | 170–175°F | 175–185°F | Tender and succulent |
| Drumsticks & Legs | 170–175°F | 175–185°F | Fall-off-the-bone |
| Chicken Wings | 175–180°F | 180–190°F | Crispy skin, juicy meat |
| Whole Chicken (Breast) | 160°F | 165°F | Evenly cooked |
| Ground Chicken | 165°F | 165°F | Fully cooked |
What You’ll Learn
- USDA safety guidelines versus culinary temperature sweet spots for white and dark meat.
- How to insert an instant-read meat thermometer to get pinpoint accuracy without false readings.
- The role of carryover cooking and resting periods in retaining moisture.
- Temperature target charts broken down by cut (breasts, thighs, wings, legs, whole birds).
- How to troubleshoot improperly cooked chicken and fix common temperature-checking errors.
What You’ll Need
Ingredients
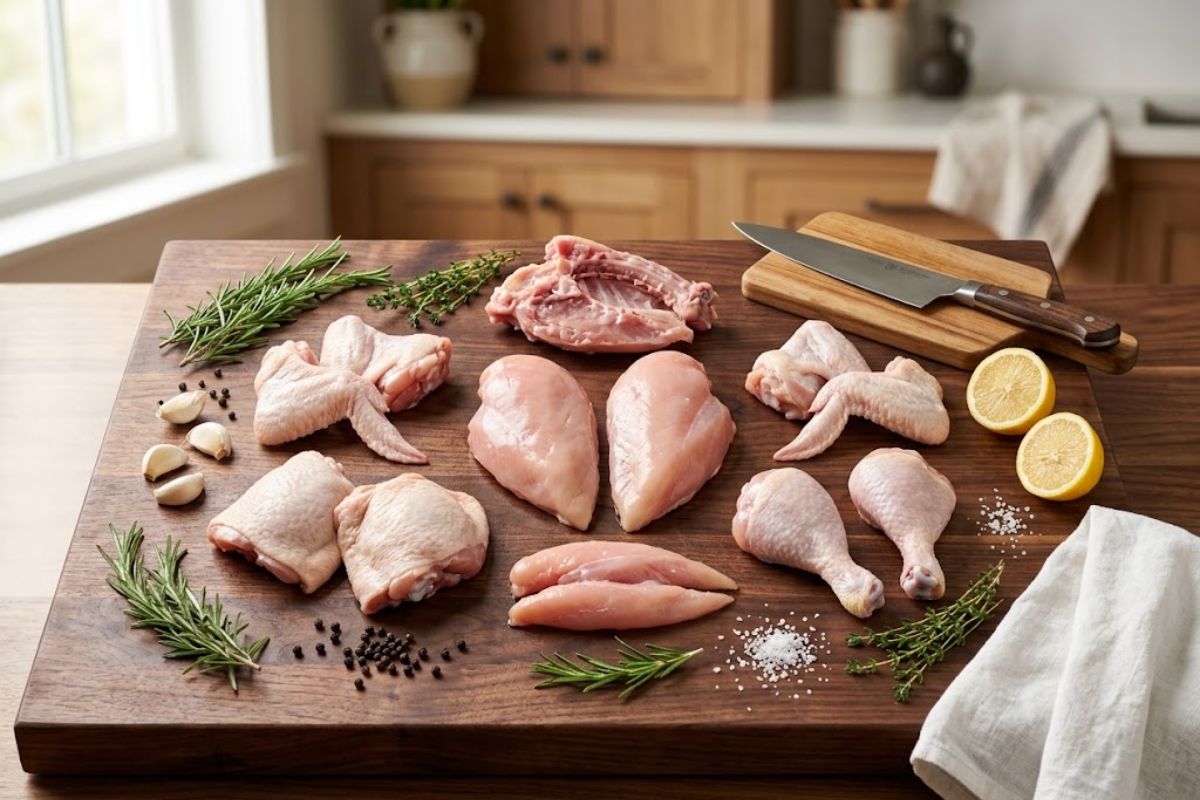
Start with high-quality meat; whether you prefer lean boneless breasts or bone-in dark meat, understanding choosing the right chicken cuts helps you anticipate cooking times and temperature targets.”
- Chicken Cuts: Boneless/skinless breasts, bone-in thighs, drumsticks, wings, or a whole roasting bird.
- High-Smoke-Point Cooking Oil: Avocado oil, canola oil, or ghee (prevents tearing skin during high-heat searing).
- Coarse Kosher Salt & Freshly Ground Black Pepper: Essential for moisture retention and crisping up skin.
Tools & Equipment
- Digital Instant-Read Thermometer: Thermapen or probe thermometer with a rapid 1-to-3-second reading speed.
- Heavy Bottomed Cookware: Cast-iron skillet, stainless steel pan, or rimmed baking sheet.
- Carving Board with Juice Groove: Prevents lost pan juices from running onto countertops during resting.
- Silicone Tongs: Ensures secure handling without piercing chicken skin prematurely.
Step-by-Step Guide: How to Measure Chicken Internal Temp Accurately
Accurate Thermometer Placement
Chicken Breast
Insert probe horizontally into the side of the thickest core area.
Chicken Thigh
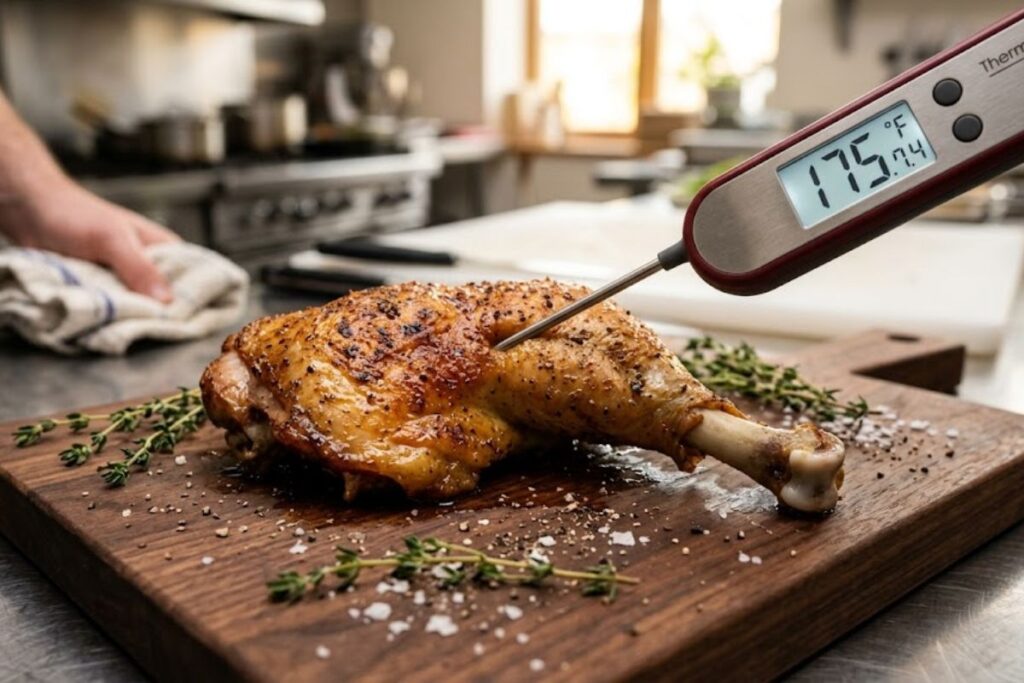
Target the deepest muscle tissue; avoid touching or pressing against bone.
Step 1: Prep and Calibrate Your Equipment
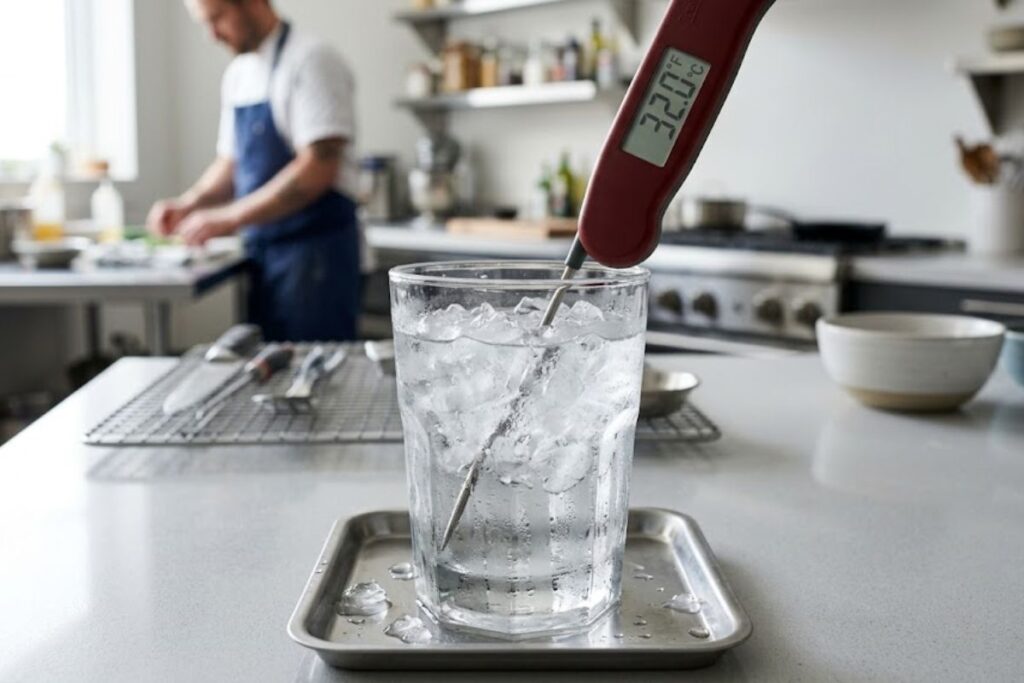
- What to do: Ensure your digital food thermometer is calibrated before inserting it into meat. Test it in an ice water bath (32°F / 0°C).
- Why it matters: An uncalibrated thermometer off by even 5°F can mean the difference between juicy chicken breast and chalky meat.
- Signs you’re doing it correctly: The display reads between 31.8°F and 32.2°F in well-stirred ice water.
- Common mistakes: Relying on dial bi-metal thermometers, which react too slowly and require deep immersion depth.
Preheating heavy cookware or baking sheets prevents cool spots; this technique is essential when preparing simple weeknight meals like an easy sheet pan lemon garlic chicken.
- Professional tip: Always choose a digital instant-read thermometer over a leave-in analog dial.
Step 2: Identify the Deepest Thermal Center
- What to do: Locate the thickest part of the chicken cut, far from visible bone, cartilage, or fat pockets.
- Why it matters: Bones transfer heat faster than muscle tissue, leading to a false high reading. Fat pockets insulate and give a false low reading.
- Signs you’re doing it correctly: The probe tip rests directly in the geometric center of the thickest muscle bundle.
- Common mistakes: Pushing the probe completely through the bottom of the piece onto the hot cooking surface.
- Professional tip: On thin chicken breasts, insert the probe horizontally into the side of the cutlet rather than vertically from the top.
Step 3: Insert the Probe and Wait for Stabilization
- What to do: Push the thermometer probe into the thickest area and hold it still for 2 to 3 seconds until the digital readout stops moving.
- Why it matters: Reading prematurely gives an undercooked measurement, leading you to overcook the meal.
- Signs you’re doing it correctly: The digital numbers stabilize completely.
- Common mistakes: Checking internal temp while holding the chicken elevated in mid-air over a smoky flame.
- Professional tip: Take temp readings in multiple spots on larger pieces or whole roasted poultry.
Step 4: Account for Carryover Cooking and Rest
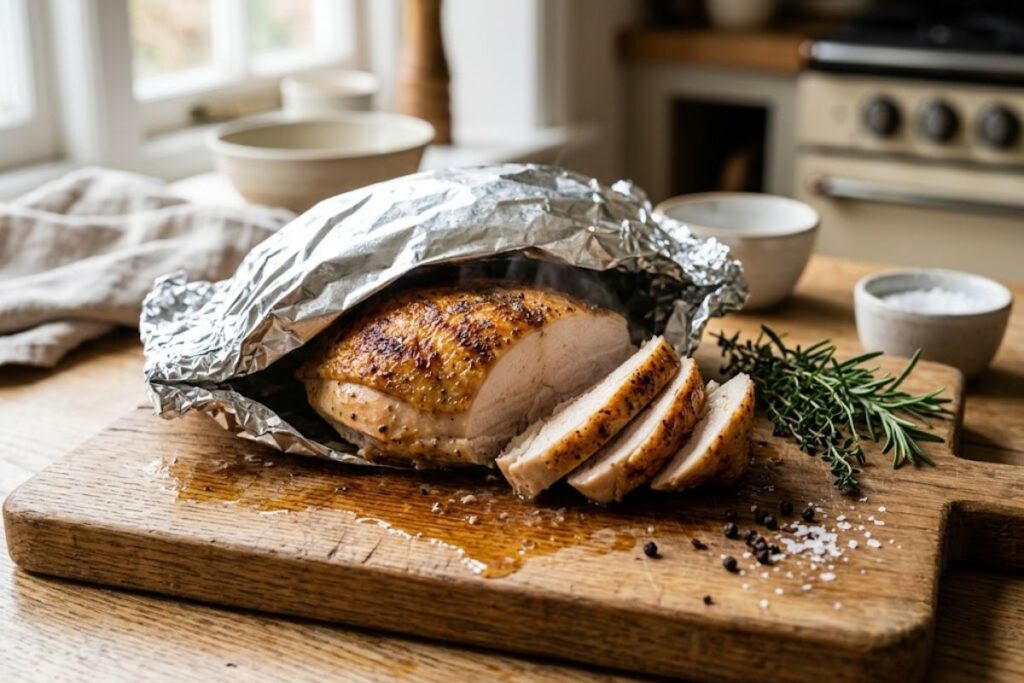
- What to do: Remove lean chicken breasts from the pan when the internal temp reaches 160°F–162°F, then tent loosely with foil for 5–10 minutes.
- Why it matters: Carryover cooking raises the internal temperature by about 3°F to 5°F while the chicken rests, helping retain moisture and preventing the meat from overcooking.
- Signs you’re doing it correctly: Muscle fibers relax, reabsorbing hot juices instead of pooling across your cutting board.
- Common mistakes: Slicing into chicken immediately after removing it from the heat source.
- Professional tip: Dark meat cuts (thighs, legs) have higher fat content and benefit from reaching 175°F–185°F where collagen breaks down into gelatin.
Expert Tips from a Test Kitchen Educator
- Leverage Time and Temperature Together: According to USDA Food Safety and Inspection Service (FSIS) guidance, food safety depends on both temperature and the amount of time the chicken remains at that temperature. While 165°F (74°C) provides an immediate safety margin, properly managed lower temperatures can also achieve safe pasteurization when held for the appropriate time.
- Never Touch Bone with the Probe: Bone conducts heat faster than tissue. If your probe hits bone, pull it back 1/2 inch to read the surrounding muscle accurately.
- Chill Breasts Before High-Heat Searing: If pan-searing or grilling boneless breasts, keep them cold in the fridge until right before cooking. This gives you time to build a dark crust before overcooking the interior.
- Target 175°F+ for Dark Meat: Dark meat cuts like thighs and drumsticks contain more collagen and connective tissue than breast meat. While they are safe at 165°F, cooking them closer to 175°F–185°F allows the collagen to break down into gelatin, creating a more tender, juicy, and flavorful texture.
- Account for Pan Residual Heat: Cooking on cast iron or heavy cookware creates more carryover heat than grilling over a wire rack. Pull meat 1–2 degrees earlier when using heavy skillets.
- Dry-Brine for Moisture Margin: Salting chicken 2 to 24 hours before cooking alters the protein structure, allowing meat to hold onto muscle water even if you overshoot target temperatures by a few degrees.
- Pound Breasts to Uniform Thickness: Irregular chicken breasts have a thin tail and thick crown. Pound them even with a meat mallet so the entire cutlet reaches safe internal temps simultaneously.
- Check the Thigh Joint on Whole Birds: When roasting whole chickens, insert the probe into the innermost part of the thigh muscle (without touching the hip joint).
- Avoid Using Color Alone as a Safety Gauge: The color of cooked chicken is not a reliable indicator of doneness. Pink or reddish areas can sometimes appear near the bone due to natural pigments in poultry, even when the chicken has reached a safe internal temperature. Always use a properly calibrated thermometer to confirm doneness.
- Sanitize Your Thermometer Probe Between Uses: Wash the metal stem with hot, soapy water or alcohol wipes between raw meat checks and final temp validation to eliminate cross-contamination risks.
Common Mistakes to Avoid
- Cutting into the Meat to Check Readiness: Piercing or slicing chicken to “check the juices” releases trapped steam and surface moisture, draining up to 15% of the total internal liquids. Always rely on a probe.
- Pulling Chicken Breasts at 165°F on the Heat: Waiting until chicken breasts reach 165°F while still in a hot oven or pan can cause the internal temperature to continue rising during rest. This carryover cooking may push lean breast meat beyond its ideal range, resulting in a firmer, drier texture. Removing breasts slightly earlier allows them to finish gently while retaining more moisture.
- Cooking Cold, Straight-From-the-Fridge Chicken: Throwing ice-cold chicken into a sizzling skillet causes the outer layer to overcook long before the center reaches safe temperatures. Let chicken sit at room temperature for 15 minutes before cooking.
- Treating White Meat and Dark Meat the Same: Chicken breast and dark meat are not interchangeable when it comes to temperature. Breast meat has less fat and connective tissue, so it requires careful monitoring to avoid moisture loss. Thighs and legs contain more collagen and reach their best texture at 175°F–185°F.
Troubleshooting Guide
| Problem | Possible Cause | Solution |
| Chicken is dry despite reading 165°F | Carryover cooking overshot the target temperature while resting. | Pull breast meat at 160°F–162°F and let rest off heat. |
| Thermometer gives erratic, jumping temperatures | Probe tip is touching bone, air pockets, or heavy fat. | Reposition probe into the deepest center muscle tissue. |
| Meat is tough and rubbery near the bone | Dark meat pulled too early at 165°F before collagen melted. | Cook thighs and leg quarters to 175°F–185°F. |
| Exterior burns before interior reaches safe temp | Cooking temp is too high, or chicken was icy cold inside. | Lower heat, cover pan, and let cold chicken rest on counter for 15 minutes before cooking. |
| Juices run red/pink despite thermometer reading 165°F | Bone marrow leaching in young poultry, or faulty probe depth. | Verify thermometer calibration in ice water; if calibrated, meat is safe. |
Storage & Reheating Guide
Refrigerator Storage
Store cooked chicken in shallow, airtight glass or BPA-free containers within 2 hours of cooking. Kept below 40°F (4°C), cooked chicken maintains peak quality for 3 to 4 days.
Freezer Storage
Wrap cooked cuts tightly in freezer paper or heavy-duty aluminum foil, then seal inside vacuum bags or freezer zip-top bags with air removed. Frozen cooked chicken keeps for 2 to 3 months without developing freezer burn.
Reheating Without Drying Out
- Oven/Toaster Oven Method: Place cooked chicken in a baking dish with 2 tablespoons of chicken broth or water. Cover tightly with foil and heat at 325°F (163°C) until the core hits 165°F.
- Skillet Method: Slice chicken evenly and warm over medium-low heat with a splash of butter or broth, covering with a lid to trap steam.
- Microwave Method: Cover chicken with a damp paper towel and heat on 50% power in 45-second intervals to prevent rubbery textures.
Meal Prep Integration
When prepping chicken for weekday lunches, cook cuts to 160°F–162°F, cool completely on wire racks, and chill quickly. Reheating will naturally bring the meat back into safe eating ranges without overcooking.
Culinary Variations & Technique Adjustments
1. Baked Chicken Temp and Time
For classic juicy baked chicken breasts, bake in a preheated oven at 400°F (204°C) for 18–22 minutes until internal temp reaches 160°F.
2. High-Heat Pan-Seared Chicken Cutlets
Pound breasts to 1/2-inch thickness, sear in a hot skillet for 3–4 minutes per side, and monitor with an instant-read probe inserted sideways until it reads 160°F.
3. Grilled Chicken Breasts & Thighs
Set up two-zone direct/indirect heating on your grill. Sear over direct flames for color, then move to indirect heat to bring internal temps up to 160°F (breasts) or 175°F (thighs).
4. Dutch Oven Braised Thighs
Braise drumsticks or thighs at low simmer in liquid; high collagen levels allow dark meat to reach 185°F–190°F for tender, fall-off-the-bone results.
5. Whole Roasted Bird
Roast at 425°F (218°C); insert a leave-in probe into the deepest part of the thigh without touching bone. Pull the entire roast when breast center reaches 160°F and thigh reaches 175°F.
6. Air Fryer Chicken Tenderloins
Air fry at 380°F (193°C) for 8–10 minutes, flipping halfway. Test smaller pieces using the tip of your instant-read probe to hit 165°F.
7. Sous Vide Precision Chicken
Cook vacuum-sealed chicken breasts in a water bath held at 145°F–150°F for 1.5 to 2 hours. The prolonged hold time achieves full pasteurization safely while retaining maximum juiciness.
Frequently Asked Questions
What temperature is chicken done cooking?
Chicken is safe to consume once all parts reach an internal temperature of 165°F (74°C). However, pulling breasts off heat at 160°F lets carryover heat safely finish the job.
Can chicken be eaten at 155°F?
Yes, provided the meat remains held at an internal temp of 155°F for at least 45 seconds continuously, which pasteurizes the poultry completely.
How do I test chicken internal temp without a thermometer?
While an instant-read digital thermometer is the only guaranteed safe method, juices running completely clear (free of red/pink tint) and firm flesh offer visual indicators.
What is the safe internal temp for chicken thighs vs. breasts?
Chicken breasts are best pulled between 160°F–162°F (finishing at 165°F). Thighs reach optimal eating texture at 175°F–185°F.
Why is my cooked chicken still pink inside when it reads 165°F?
Young poultry bones leach pigment during cooking, leaving surrounding meat pink. As long as your calibrated thermometer reads 165°F or higher, it is safe.
Where do you insert a meat thermometer in a whole chicken?
Insert the probe into the thickest part of the thigh muscle, avoiding bone, or into the deepest core of the breast.
What temp should ground chicken be cooked to?
Ground chicken must reach 165°F (74°C) throughout, as surface bacteria become distributed during grinding.
How much does carryover cooking increase chicken temp?
Chicken pieces usually rise 3°F to 5°F during a 5-to-10-minute rest, depending on thickness and cooking vessel.
What is the safe poultry temperature for turkey and duck?
All domestic poultry, including turkey, duck, and goose, shares the same USDA minimum safe internal temperature of 165°F (74°C).
Can you overcook chicken thighs?
Dark meat thighs are forgiving due to higher fat and collagen content, but going above 200°F for long periods can cause them to dry out.
Related Guides & Recipes
Complement your cooking techniques with these step-by-step guides and weeknight favorites:
- Master cut selection before checking temps with our guide on How to Choose Chicken Cuts for Every Recipe.
- Put your pan-searing skills to work with this simple Lemon Garlic Chicken Sheet Pan Recipe.
- Perfect for winter comfort, try this hearty Creamy Chicken and Rice Casserole.
- Practice measuring dark meat temps with an authentic Easy Yemeni Chicken Mandi Rice Recipe.
- For festive holiday gatherings, pair your poultry techniques with our Herb Butter Turkey Recipe.
Printable Chicken Internal Temperature Chart
Save this quick-reference chart for your kitchen. Whether you’re grilling, baking, roasting, or air frying, having the correct chicken internal temperatures within reach makes it easy to cook every cut safely and consistently. Print the chart or bookmark this page so you can check the recommended temperatures for chicken breasts, thighs, wings, drumsticks, whole chickens, and ground chicken whenever you cook.
Tip: *For the juiciest results, remove chicken breasts from the heat at 160–162°F and let carryover cooking bring them to the USDA-recommended 165°F while resting. Dark meat develops its best texture when finished between 175°F and 185°F.
Conclusion
Mastering chicken internal temperature is one of the simplest ways to improve your cooking. Instead of relying on guesswork, cooking times, or the color of the meat, use an instant-read thermometer to know exactly when your chicken is perfectly cooked. Remember that 165°F (74°C) is the USDA’s minimum safe temperature for all chicken, while dark meat reaches its best texture between 175°F and 185°F.
Now that you know the correct internal temperatures for every cut, keep this guide handy and save or print the Chicken Internal Temperature Chart for your next meal. A quick temperature check takes only a few seconds, but it helps you serve chicken that’s consistently safe, juicy, and full of flavor—whether you’re grilling, baking, roasting, air frying, or pan-searing.