The Sensory Audit of a Tuesday

5:45 PM.
Your phone glows that cold, artificial blue as you scroll through delivery apps you’ve already memorized. Every option looks the same—over-sauced chicken, limp vegetables, a side of regret. Outside, the air still carries that mix of exhaust and damp pavement from a long commute. Your shoulders are tight, your brain is done negotiating decisions, and even something as simple as boiling water feels like a task you’d rather outsource.
This is the exact moment most people abandon their best intentions.
This is where easy dinner ideas usually fail—not because you don’t care about food, but because you don’t have the energy to fight for it.
That night, standing in a cramped kitchen with barely enough counter space to turn around, something shifted. It wasn’t inspiration. It was frustration.
Why did takeout always taste better—even when it clearly wasn’t?
The answer wasn’t better ingredients.
It was heat.
It was timing.
It was thermal control.
And that realization led to something unexpectedly powerful: The Double-Sear Method—a way to recreate that addictive, crispy, glossy takeout texture in exactly 30 minutes, using nothing more than a sheet pan and a few pantry staples.
The Takeout Anatomy: Why Tuesday Cravings Feel So Strong
There’s a reason that pull toward takeout feels almost automatic—especially on a Tuesday evening when your energy is already depleted.
It isn’t just hunger. It’s chemistry and psychology working together.
Most takeout food is engineered around what’s often called the “bliss point”—a precise balance of salt, sugar, and fat that lights up your brain’s reward system. Salt enhances flavor, sugar adds immediate satisfaction, and fat delivers richness that lingers. But that’s only part of it. The real hook is mouthfeel—the contrast between crispy and tender, sticky and juicy, hot and saucy. That sensory combination creates a feedback loop your brain remembers and craves.
Now add fatigue.
By Tuesday night, decision-making energy is already low. This is where home cooking fatigue sets in. It’s not that cooking is hard—it’s that thinking feels hard. Even simple steps like chopping vegetables or timing a pan feel like too many decisions stacked together.
Takeout, on the other hand, offers something powerful: consistency without effort.
Restaurants don’t rely on guesswork. They operate on repeatable systems:
- High, controlled heat
- Pre-prepped ingredients
- Precise timing for texture and finish
Every dish is designed to hit that same sensory target every time.
At home, the gap isn’t skill—it’s structure. You’re capable of better food, but without a system, results vary. That inconsistency is what nudges you back toward takeout.
Here’s the overlooked truth:
Your kitchen is actually better equipped for quality and health.
You control the oil, the freshness, the seasoning, and the cooking method. What’s missing isn’t ability—it’s a reliable system that works even when you’re exhausted.
That’s exactly where the Double-Sear Method changes everything.
It replaces decision fatigue with a predictable outcome. It gives you the same crispy, saucy, satisfying texture your brain is asking for—without relying on excess grease or heavy processing.
So when the craving hits, it stops being a battle of discipline.
It becomes a choice between two systems: one built for convenience, and one built for control. But to take control, we first have to identify why most quick chicken dinner ideas fall short.
Why Most Quick Chicken Dinner Ideas Fall Short
There’s a reason so many quick chicken dinner ideas feel disappointing.
They’re built around speed—but not structure.
- Chicken goes into the pan wet → it steams
- Sauce gets added too early → it dilutes and burns
- Heat stays moderate → no caramelization
You don’t get crispness. You don’t get depth. You get something… fine.
But “fine” doesn’t beat takeout.
This method does.
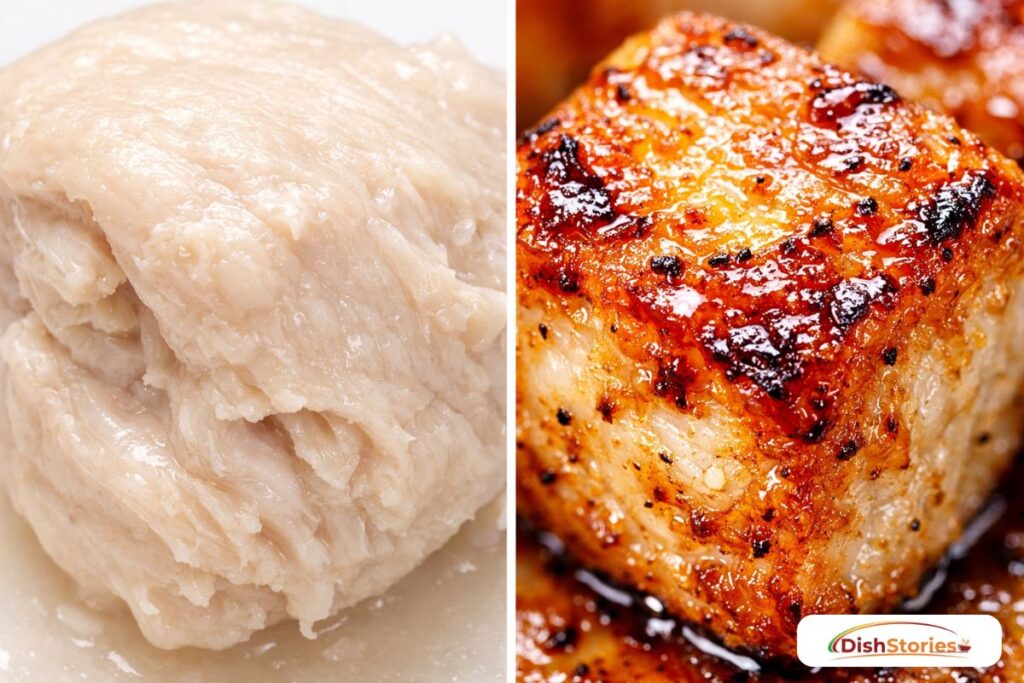
The Science of “The Texture Gap”
What separates disappointing home cooking from crave-worthy takeout isn’t a secret ingredient—it’s control over moisture and heat.
Most people think they’re “searing” chicken when they cook quickly. In reality, they’re often steaming it.
Here’s why.
Chicken naturally contains water. The moment it hits heat, that moisture starts escaping. If your pan—or sheet pan—is crowded, those escaping water molecules have nowhere to go. Instead of evaporating, they get trapped between the pieces of chicken. The result? A humid micro-environment—a steam bath.
And steam changes everything.
Instead of forming a crust, the surface stays soft. Instead of concentrating flavor, it dilutes it. You lose the very texture your brain associates with satisfaction.
This is what we call the texture gap—the difference between what you expect (crispy, caramelized, restaurant-quality) and what you get (pale, soft, forgettable).
The solution is space and heat working together.
When chicken pieces are spaced out, moisture can escape into the surrounding air and evaporate quickly. This allows the surface temperature to rise above the boiling point of water—unlocking something critical: the Maillard Reaction.
This isn’t just “browning.”
It’s a chain reaction where amino acids (from protein) and natural sugars reorganize under high heat to create entirely new flavor compounds. That deep, savory, slightly smoky taste? That’s the Maillard Reaction doing its job.
Without it, food tastes flat.
With it, food tastes finished.
This is also why high-heat oven cooking works so well. The circulating hot air acts like a dry, consistent heat source—removing moisture while evenly developing that crust.
You’ll see the same principle applied in other sheet-pan dishes, like Lemon Garlic Butter Salmon, where spacing and temperature create a perfectly textured surface without complicated steps.
Once you understand this, everything changes.
You stop chasing recipes—and start controlling results.
The Double-Sear Method: A System, Not Just a Recipe
This is where things change.
Instead of rushing everything at once, you create two distinct phases of heat:
Phase 1: Dry Heat Sear
The Moisture Purge. High heat forces surface evaporation, locking in structure before the sauce ever touches the pan.”
Phase 2: Glaze Activation
A concentrated sauce hits the hot surface late, caramelizing instantly instead of breaking down.
This is the difference between:
- soggy vs crisp
- flat vs layered flavor
- forgettable vs repeat-worthy
It’s the backbone of truly effective quick and easy chicken recipes for dinner.
The Secret to Success
Before we get into the recipe, lock these in:
- Dry chicken is non-negotiable
- High heat is your ally, not your enemy
- Space equals crispness—don’t crowd
- Cornstarch creates structure, not heaviness
- Sauce is a finishing move, not a marinade
- Timing is flavor
20-Minute Sheet-Pan “Firecracker” Chicken for Easy Dinner Ideas
Easy Dinner Ideas Chicken Recipe That Actually Deliver Flavor
Equipment
- 1 Large rimmed baking sheet
- 1 Mixing bowl
- 1 Small whisk
Ingredients
- 1.5 lbs chicken thighs cubed
- 2 tbsp cornstarch
- 1 tsp smoked paprika
- 1 tsp garlic powder
- 2 tbsp honey
- 3 tbsp soy sauce or tamari
- 1 tbsp rice vinegar
- 2 tsp sriracha
- 1 tsp sesame oil
- 2 cups broccoli florets
- 1 red bell pepper sliced
Instructions
Prep the Chicken
- Pat the chicken completely dry using paper towels. Toss with cornstarch, smoked paprika, and garlic powder.Why this matters: Surface moisture creates steam. Steam prevents browning. Removing it allows direct heat contact, which triggers crust formation.
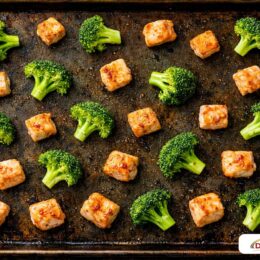
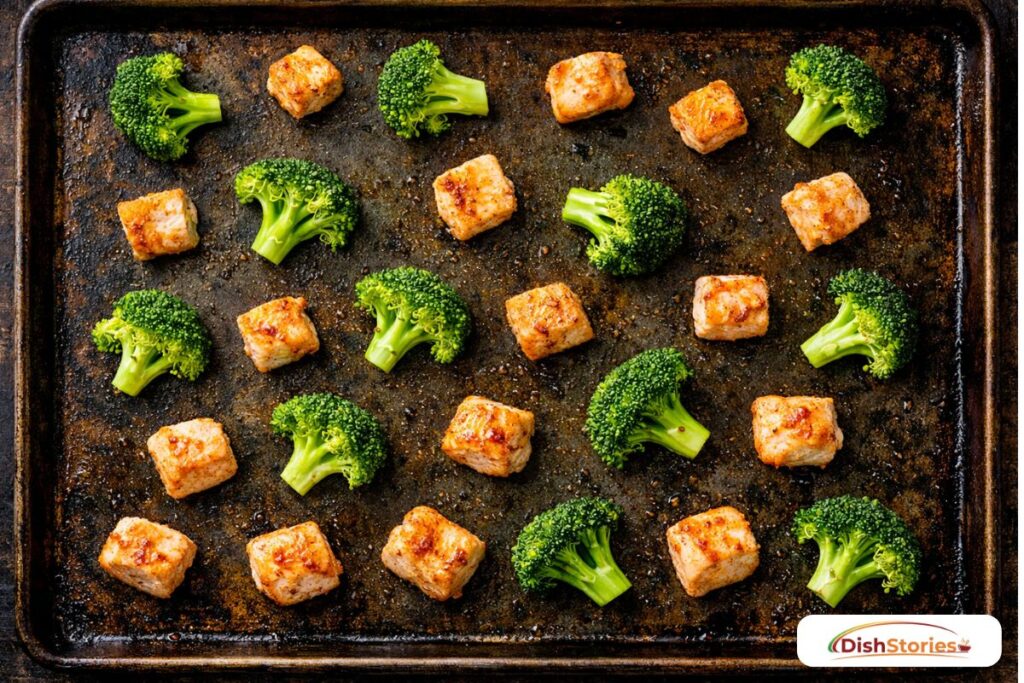
First Sear (450°F Oven Blast)
- Preheat oven to 450°F (230°C). Spread chicken evenly across the sheet pan. Add broccoli and bell peppers.Roast for 15 minutes.What’s happening here: The high heat rapidly evaporates residual moisture while initiating the Maillard reaction—this is where flavor begins.
Build the Firecracker Glaze
- Whisk together:HoneySoy sauceRice vinegarSrirachaSesame oilThis isn’t just sauce—it’s a controlled glaze designed to react under heat.
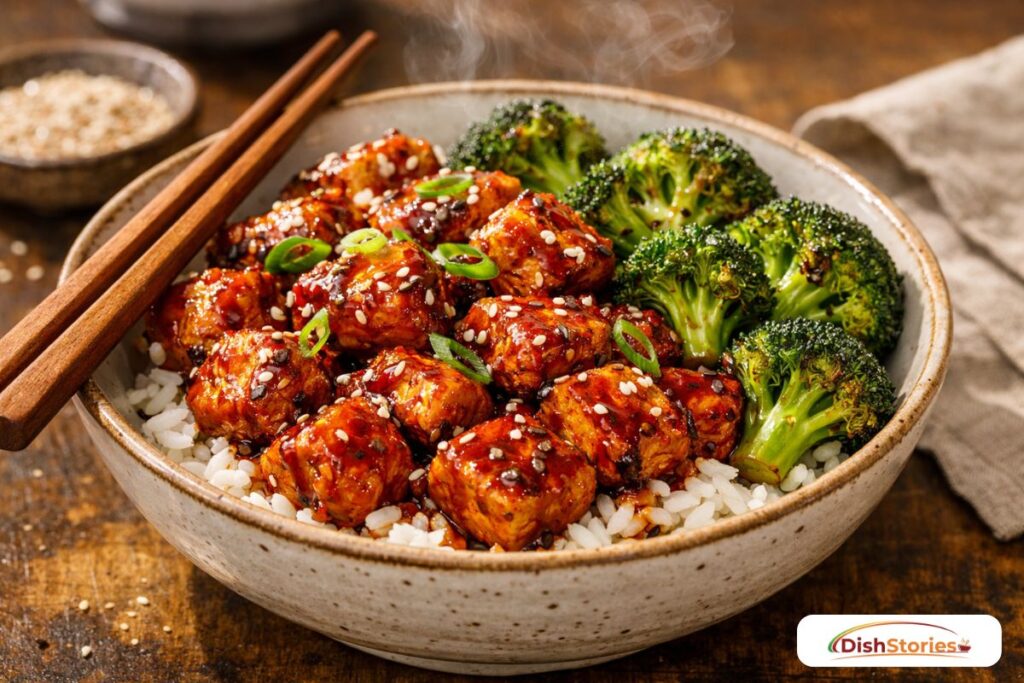
Second Sear (Glaze + Heat)
- Remove tray, drizzle sauce over everything, and toss quickly.Return to oven for 5 minutes.Critical moment: The sugars in the honey caramelize rapidly, binding to the crisp surface instead of soaking into it.
Serve Immediately
- You’ll notice the difference instantly:Edges are crisp, not softSauce clings instead of poolingFlavor is concentrated, not diluted
Video
Notes
The Architecture of a Firecracker Glaze
The Firecracker Glaze isn’t just a sauce—it’s a chemical reaction waiting to happen. While the ingredients are staples, their interaction at 450°F is what creates that signature restaurant finish.
This glaze isn’t random—it’s structured. Every component has a job. When you understand those roles, you stop following recipes blindly and start thinking like a chef.
Honey: The Structural Sweetness
Honey isn’t just there to make things taste sweet.
It’s the backbone of the glaze.
Because of its high natural sugar concentration, honey caramelizes rapidly under high heat. This is what creates that sticky, glossy coating you associate with takeout-style chicken. It also thickens quickly without needing starch, allowing it to cling to the surface rather than drip off.
More importantly, honey helps bridge flavor—it softens the sharpness of vinegar and balances the saltiness of soy sauce, creating a unified profile instead of competing notes.

Soy Sauce: The Depth Builder
Soy sauce brings salt, but more importantly, it brings umami.
Umami is what makes food taste complete. It enhances the savory depth of the chicken and interacts directly with the Maillard reaction, amplifying those browned, roasted flavors created during the first sear.
It also provides the liquid base of the glaze, helping distribute all other ingredients evenly across the surface.
Rice Vinegar: The Brightener
Without acid, this dish would feel heavy.
Rice vinegar cuts through the richness of chicken thighs and the sweetness of honey. It sharpens the entire flavor profile, preventing the glaze from becoming cloying.
Think of it as contrast. It lifts everything.
Instead of a one-note “sweet and salty,” you get balance—something that tastes lighter, cleaner, and more precise.
Sriracha: The Controlled Heat
Sriracha isn’t just about spice—it’s about controlled intensity.
It adds heat, but also a subtle tang and garlic undertone that deepens the glaze without overpowering it. Because it’s blended into the sauce rather than added at the end, the heat becomes integrated instead of aggressive.
This is how you build warmth without losing balance.
Sesame Oil: The Aromatic Finish
Sesame oil is not a cooking oil here—it’s a finishing oil.
It has a low smoke point, which means prolonged high heat can turn it bitter. That’s why it’s added as part of the glaze late in the process.
Its role is aromatic. Just a small amount delivers a nutty, toasted fragrance that rounds out the dish and gives it that unmistakable “takeout” identity.
Cornstarch: The Silent Architect
Though technically part of the chicken coating, cornstarch plays a key role in how the glaze behaves.
It creates a lightly textured surface—almost like microscopic ridges—that allow the sauce to grip onto the chicken instead of sliding off. This interaction is what transforms the glaze from a liquid into a coating.
When all these elements come together under high heat, you’re not just cooking—you’re engineering.
Sweetness caramelizes. Acid sharpens. Umami deepens. Aromatics finish.
And suddenly, what looked like a basic pantry meal becomes something layered, intentional, and deeply satisfying.
That’s the difference between assembling ingredients—and building flavor.
Mastering the Method: The Anti-Soggy Manifesto
This is where most home cooking goes wrong—and how you avoid it permanently.
1. Dry Surface = Crisp Texture
Water is the enemy of browning. Removing it allows temperatures to exceed boiling point, unlocking real sear.
2. Cornstarch = Structural Advantage
Cornstarch forms a micro-thin coating that crisps quickly and holds sauce without becoming heavy.
3. Late Sauce Application = Flavor Control
Adding sauce early causes breakdown. Adding it late creates adhesion and gloss.
This is the foundation of the “Anti-Soggy” system.
Kitchen Notes (Real-World Adjustments)
- If your pan looks crowded, use two trays
- If sauce thickens too fast, reduce oven time slightly
- If you want deeper char, finish with a short broil
- This technique mirrors what’s used in dishes like Easy Gochujang Salmon—controlled heat, layered late
Nutrition (Per Serving)
- Calories: 345 kcal
- Protein: 32g
- Net Carbs: 14g
- Fat: 12g
For full macro verification, consult USDA FoodData Central.
Make It a Complete Meal
This dish stands on its own—but pairing elevates it:
- Light rice or cauliflower rice
- Crisp cucumber salad
- Or a refreshing contrast like a Strawberry Lemonade Refresher
For deeper comfort cooking, compare this speed-focused method to something like a Melt-Away Crock Pot Roast—both powerful, but built for different moments.
Can I Make This Ahead?
Yes—with structure.
- Cube and season chicken ahead
- Chop vegetables in advance
- Store sauce separately
This preserves texture and prevents breakdown before cooking.
The Meal Prep Logic: Your 30-Minute Efficiency Protocol
“Can I make this ahead?” is the right question—but the better question is: how do I make this easier every time after today?
This is where a simple recipe becomes a repeatable system.
Think in Batches, Not Meals
If you’re already cubing 1.5 lbs of chicken, you’re doing the work. Doubling it to 3 lbs doesn’t double the effort—it adds maybe two extra minutes.
That extra batch becomes future you’s advantage.
- One portion for tonight
- One portion for later in the week
This is the foundation of efficient chicken meals for dinner—not cooking more often, but cooking smarter each time.
Freeze Smart: Dry vs. Sauced
How you store it matters just as much as how you cook it.
Option 1: Freeze “Dry-Coated” Chicken (Best Method)
- Cube the chicken
- Toss with cornstarch and spices
- Store in an airtight freezer bag
👉 Why this works: The coating stays intact, and when thawed, the chicken can go straight into high heat without excess moisture. This preserves texture.
Option 2: Freeze Fully Sauced Chicken (Use Carefully)
- Combine chicken and sauce before freezing
👉 Trade-off: Convenient, but the sauce draws out moisture over time. This can reduce crispness during cooking.
For best results, keep sauce separate until cooking day.
The Tuesday Night Timeline (Proof It Works)
This isn’t theory—it’s execution.
5:45 PM – Walk in, preheat oven to 450°F
5:47 PM – Take chicken out, pat dry
5:50 PM – Toss with cornstarch + spices
5:52 PM – Chop broccoli and bell pepper
5:55 PM – Spread everything on sheet pan
5:56 PM – Put tray in oven (15 minutes begins)
6:00 PM – Quickly whisk glaze
6:10 PM – Clean up cutting board (you’re done early)
6:11 PM – Pull tray, add sauce, toss
6:12 PM – Back into oven
6:17 PM – Done. Crispy, glazed, ready to eat
This is what separates random cooking from a system.
You’re not guessing. You’re not rushing.
You’re executing a plan that fits into real life—exactly when you need it most.
How to Store Leftovers
- Use airtight glass containers
- Refrigerate up to 3 days
Reheating Strategy
Avoid microwaves.
Instead:
- Air fryer (3–5 minutes)
- Skillet reheating
This restores crispness instead of softening it.
Ingredient Substitutions
| Ingredient | Substitute |
|---|---|
| Honey | Maple syrup |
| Soy sauce | Coconut aminos |
| Chicken | Firm tofu |
| Sriracha | Chili garlic sauce |
| Cornstarch | Arrowroot powder |
Easy Dinner Ideas FAQ Section:
How do I get the chicken crispy without deep frying?
Cornstarch + high heat creates a dry surface that crisps rapidly without oil immersion.
What type of chicken is best?
Thighs are ideal. They retain moisture and develop better flavor under high heat compared to breast meat.
How can I make this gluten-free?
Use tamari or coconut aminos instead of soy sauce.
Fastest way to chop vegetables?
Go large and uniform. Precision slows you down—consistency ensures even cooking.
How can I increase heat?
Add chili flakes or increase sriracha gradually.
How does Double-Sear change texture?
It creates a layered exterior—first crisp, then lacquered—without compromising internal moisture.
Best zero-effort sides?
Pre-cooked rice
Bagged salad kits
Steamed frozen vegetables
How do I know if my oven is actually at 450°F?
Most home ovens aren’t perfectly calibrated. You might set 450°F, but the real temperature could be off by 15–25 degrees—and that’s enough to affect texture.
Solution: Use an inexpensive oven thermometer. Place it inside while preheating and check the actual reading.
👉 Why it matters:
If your oven runs cool, your chicken won’t reach the temperature needed for proper browning. Instead of crisping, it will slowly dry out.
If it runs hot, your glaze can burn before it properly caramelizes.
Accurate heat = predictable results.
What if I only have chicken breasts?
You can still make this work—but you need a slight adjustment.
Chicken breasts are leaner, which means they dry out faster under high heat.
Fix: Adjust the velveting step
Slice into slightly larger chunks
Add 1 tsp oil when tossing with cornstarch
Reduce initial cook time by 2–3 minutes
👉 Why this works:
The oil adds a thin protective layer, helping retain moisture while still allowing the surface to crisp.
You’ll get a slightly lighter texture, but still within that “takeout-style” range.
How does this method compare to deep frying in terms of health?
Deep frying fully submerges food in oil, dramatically increasing calorie density.
This method uses:
Minimal added fat
High heat air circulation
Natural fat from the chicken itself
Result:
Similar crispy texture
Significantly lower oil absorption
Cleaner, less greasy finish
You’re essentially maximizing flavor-per-calorie, which is why this works so well as part of realistic easy dinner ideas that don’t feel restrictive.
Why does my chicken sometimes release too much water?
This usually comes down to one of three things:
Chicken wasn’t dried properly
Pan was overcrowded
Chicken was previously frozen and not fully thawed
Fix:
Pat dry thoroughly and give each piece space. If needed, cook in two batches.
Can I use frozen vegetables?
Yes—but with one adjustment.
Frozen vegetables release more water, which can interfere with browning.
Best approach:
Roast chicken separately for the first 10 minutes
Add frozen vegetables halfway through
This keeps the texture balanced.
Can I make this less sweet?
Absolutely.
Reduce honey slightly and increase rice vinegar or soy sauce in small increments.
👉 The goal is balance—not removing sweetness entirely, but shifting the ratio toward savory.
What’s the biggest mistake beginners make with this method?
Trying to rush the structure.
Adding sauce too early, skipping drying, or lowering heat “just to be safe” all lead to the same result: lost texture.
This method works because each step has a purpose. Follow the sequence, and the outcome takes care of itself.
Technical Note: The Food Science Behind the Method
From a culinary science perspective, the cornstarch coating acts as a hydrocolloid barrier. It absorbs surface moisture and undergoes thermal gelatinization instantly at 450°F, forming a porous crust.
This crust increases surface area, allowing the honey-soy glaze to adhere through capillary action rather than sliding off.
Adding the sauce late prevents sugar burn (sucrose pyrolysis), ensuring that the Maillard reaction—not burning—drives flavor complexity.
For deeper reading, explore Serious Eats’ Guide to the Maillard Reaction.
Final Thought: This Changes the Equation
You don’t need more recipes—you need control.
This is one of those rare easy dinner ideas that redefines how you approach cooking under pressure.
It transforms:
- hesitation into action
- exhaustion into efficiency
- ingredients into something you actually crave
And once you realize that restaurant-level texture is just a matter of heat and timing?
Takeout stops being the solution.
It becomes the compromise.